HOW TO CHANGE THE DEFAULT RATE
You can change the default rate for the entire parking facility or a garage within the facility (Campus Mode) using the Flash Valet app, or the Flash Admin Portal.
Using the Flash Valet app
Price selection for Locations
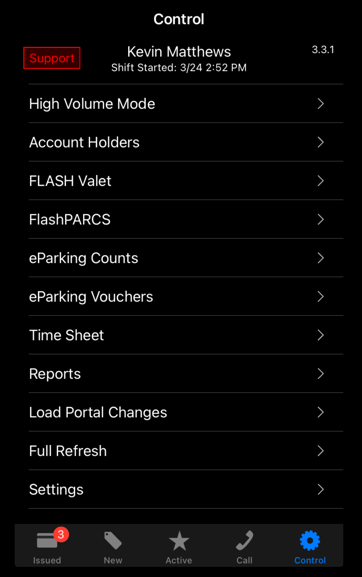
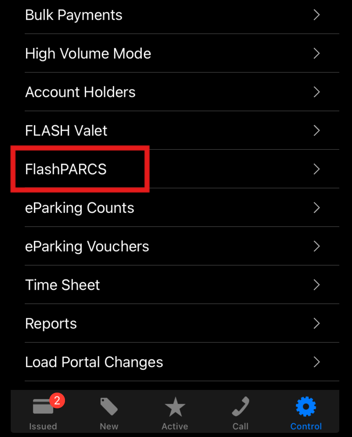
1. Log into the Flash Valet app and go to Control > Flash PARCS.
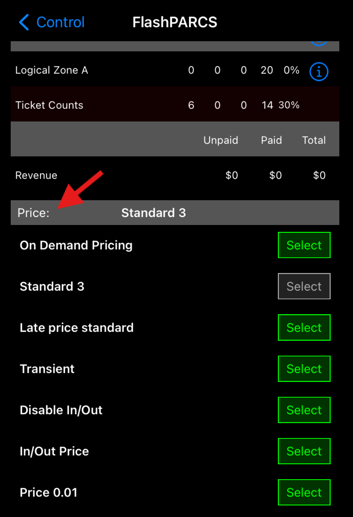
2. Scroll down to the Price section where the selected price will be displayed > Select the desired price.
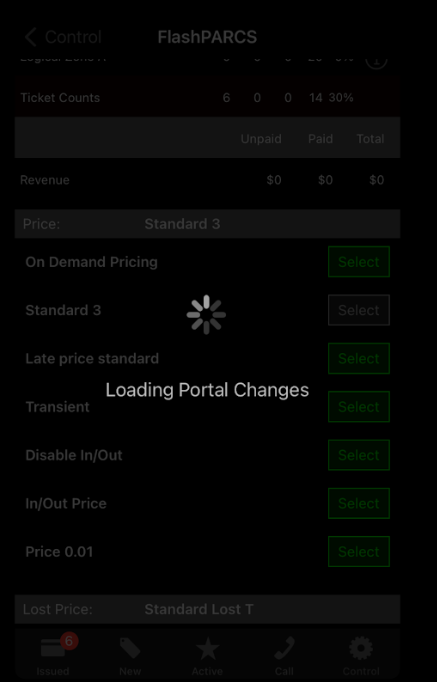
3. When pressing the Select button for any price, the app loads the portal changes and displays a brief loading screen.
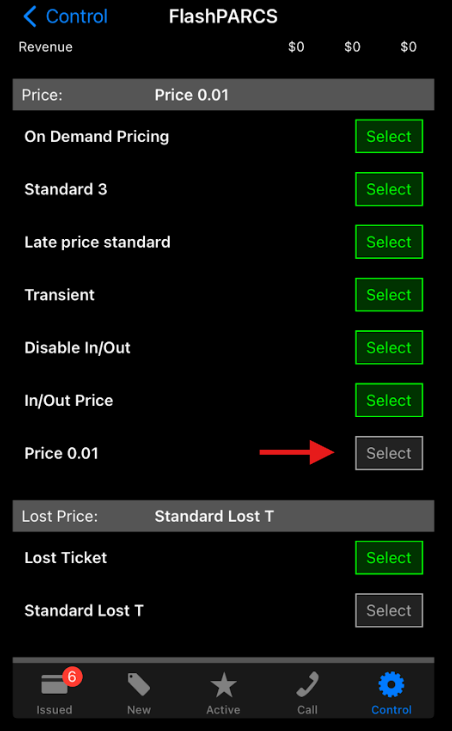
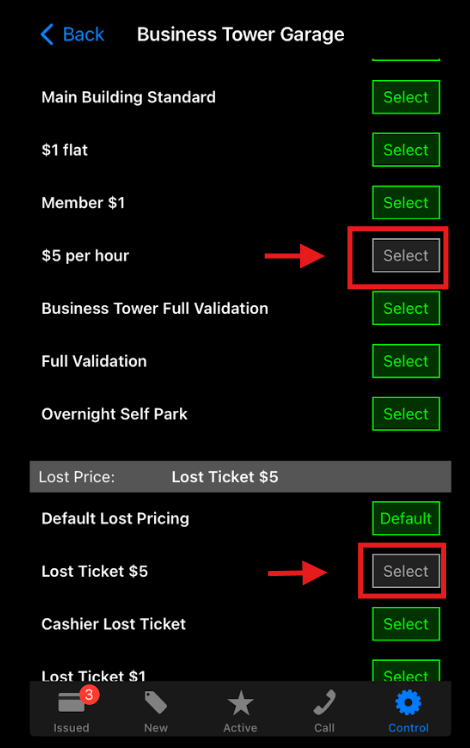
4. The selected price will be shown as grayed out and applied to transient tickets, the same changes can be made to any ticket type configured in the Admin Portal, which will appear in the tabs below, such as Lost Ticket and/or Prepay.
Price selection on Logical Zones (Campus Mode)
1. Go to Control > Flash PARCS.
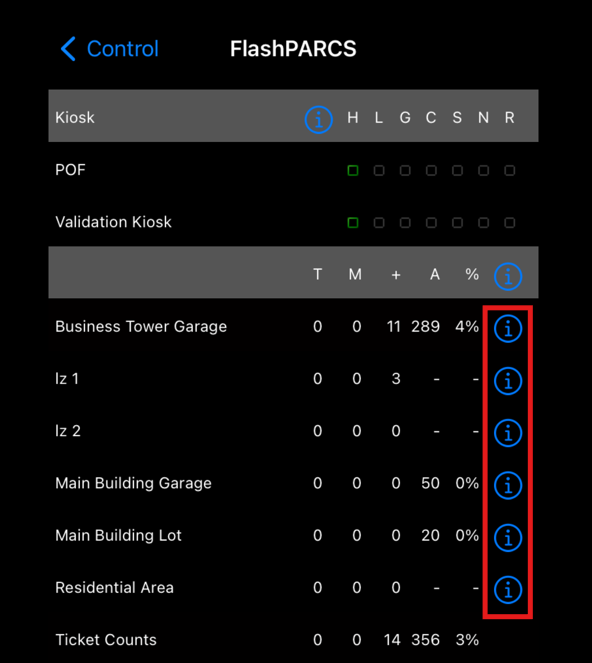
2. Scroll down to the Logical Zone section and select the logical zone by tapping the blue (i) icon.
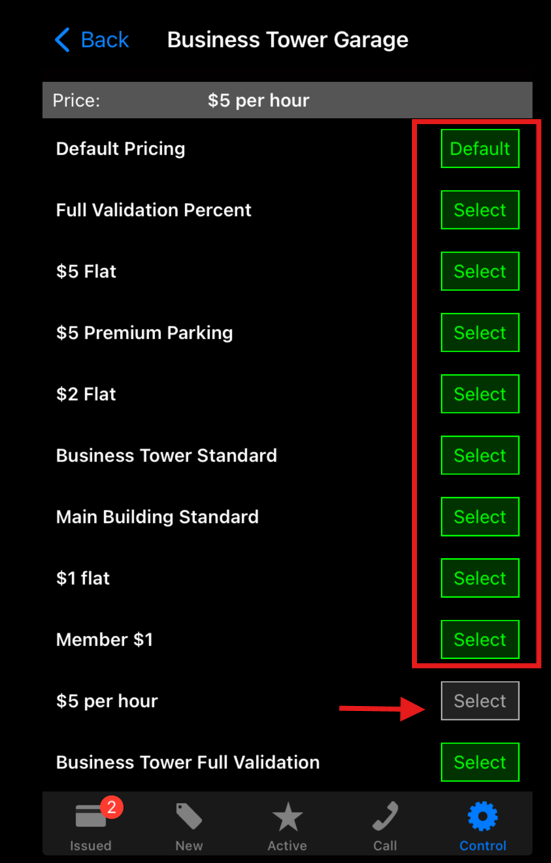
3. Scroll down to the Price section. To change the price, tap the green "Select" button on the price, then confirm your selection.
4. The selected or active price shows a greyed-out Select box.
Using the Flash Admin Portal
Price selection for locations
1. In the Admin Portal, select your Location.
2. From the orange menu, go to Ticket Types.

3. Select the ticket type you want to update.
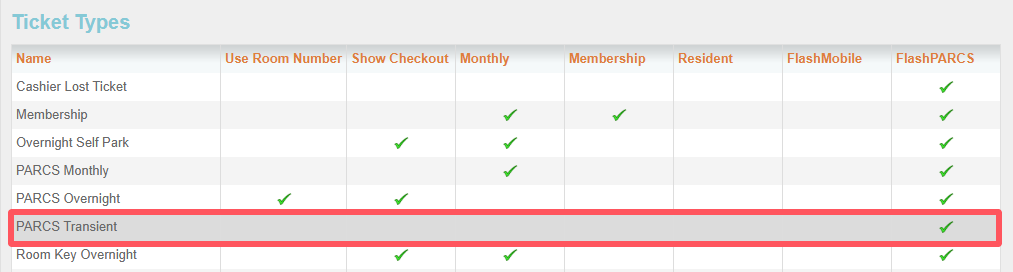 4. Scroll to the Linked Flash PARCS Prices section and select the price you want to apply.
5. Check the Selected box, then click Save.
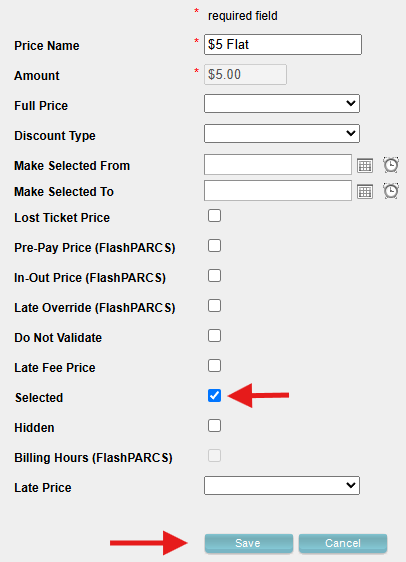
Prices marked as Selected/Default cannot be deleted. To delete a price, first set a different price as the Default.Price selection on Campus Mode (Logical Zones)
1. In the Admin Portal, select your Location.
2. From the orange menu, go to Logical Zones.

3. Select the Logical Zone you want to update.
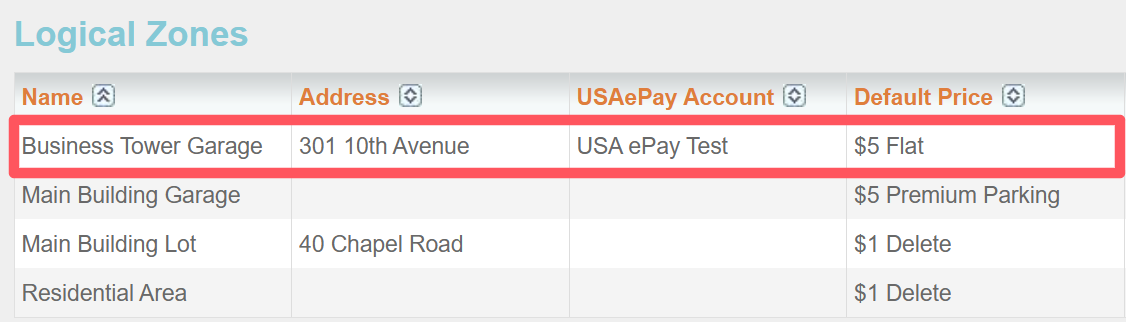
4. Scroll down to the Linked Flash PARCS Prices section and select the price you want to set as Default.
5. Check the Selected box, then click Save.
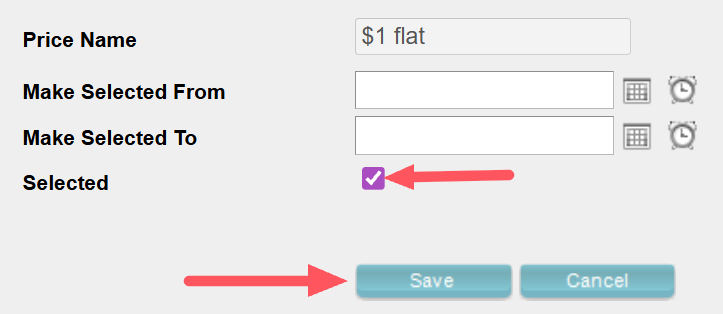
Prices marked as Selected/Default cannot be deleted. To delete a price, first set a different price as the Default.Make Selected From / Make Selected To Fields
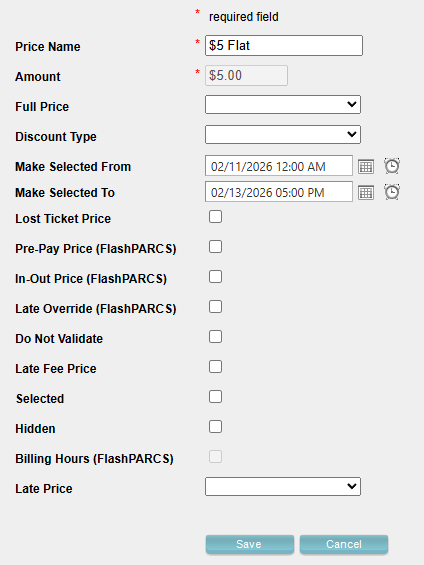
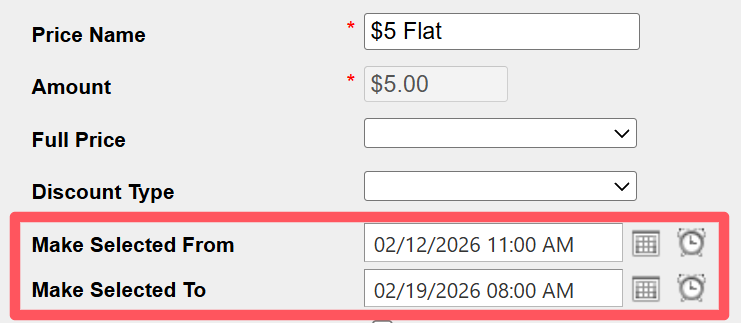
In the Admin Portal, you can use the Make Selected From and Make Selected To fields to schedule temporary prices for one-time events. When the schedule ends, the system automatically reverts to the previous rate.
Set Up
- Log in to the Admin Portal.
- Select the Location.
- Navigate to the Ticket Type tab, or the Logical Zone tab (for locations with Logical Zones).
- Scroll down to the Linked Flash PARCS Prices section.
- Click the price you want to schedule and ensure it is not selected (✔). If it is selected, the Make Selected From/To fields will be grayed out. Or add a new price.
- Set the desired date and time for the price schedule.
- Click Save to apply the changes.
Enable the “Make Automatic” Setting
For this feature to work, Make Automatic must be enabled either at the Ticket Type level or at the Logical Zone level (for locations with Logical Zones only).
Keep in mind:
- Make Automatic is disabled whenever a rate is manually selected as the default. To reactivate the Make Selected From/To fields, you must re-enable Make Automatic after manually selecting a rate.
- If Make Automatic is enabled during the valid time, the rate change will not take effect. Make Automatic must be enabled before the valid time begins.
- Once enabled, the Make Automatic setting will appear greyed out.

Was this article helpful?
That’s Great!
Thank you for your feedback
Sorry! We couldn't be helpful
Thank you for your feedback
Feedback sent
We appreciate your effort and will try to fix the article