PREPAY MODE OVERVIEW
Flash PARCS kiosks can be configured to require a transient parker to pay at the entry kiosk. When this mode is enabled, the entry kiosk displays the rate option(s) and allows the transient parker to process the payment with a credit card. Once the payment is processed, the kiosk prints a ticket and receipt with a barcode that can be used at the exit kiosks.
PrePay Rate Options
Parking locations may use different prepaid pricing options depending on their operational needs.
Select the Amount of Time to Pay
This option allows you to choose how long you plan to park.
You’ll see multiple time-based rate choices at the entry kiosk and can select the option that best fits your stay before completing payment.
Set Price Until a Specific Time
This option applies a single prepaid price for all incoming parkers.
The flat rate covers parking until a designated time set by the location, regardless of when you entered during that period.
Prepay rates are set up by Flash Support, but location Admin users can use the Flash Valet app or the Admin Portal to activate the prepay rates.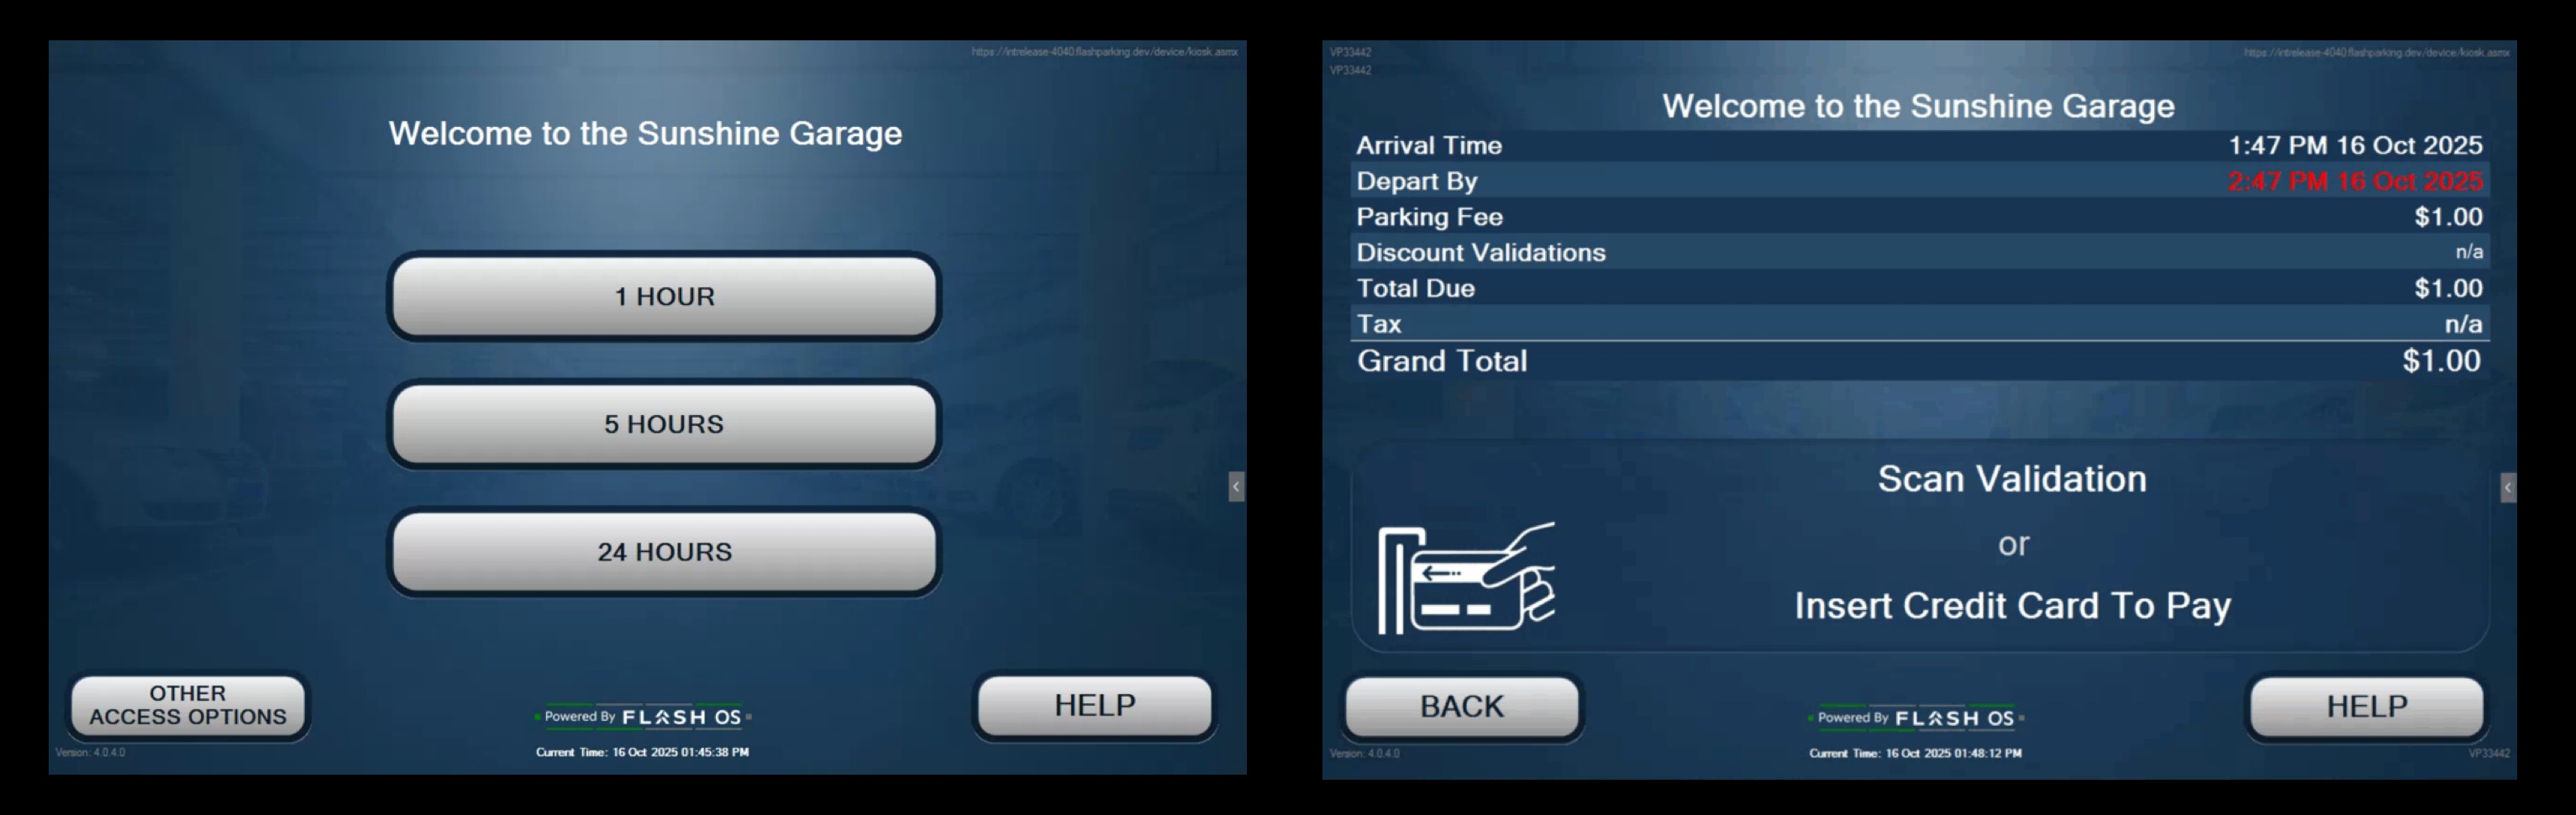
Entry Payment Process

Step 1. The parker selects a rate.
Step 2. The parker pays in advance for their selected rate.
Step 3. Take a ticket and enter the facility.
Step 4. Upon exit, they scan their ticket or receipt and the gate will vend. If they exit after their selected rate has expired, the set late fee is applied.
100% discount coupon for an overage or late fee is supported. Time-based coupons are not supported.How to Enable PrePay Mode
You can use the Flash Valet app or the Admin Portal to set a Flash PARCS kiosk to prepay mode. Follow the steps below based on whether you’re using the Flash Valet app or the Admin Portal.

Via Flash Valet App
- Log in to the Flash Valet App.
- Tap Control > Flash PARCS.
- Scroll to the Pay on Entry section.
- Next to the prepay price, tap Select.
Via Flash Admin Portal
1. Go to https://portal.flashvalet.com and log in to the Admin Portal.
2. On the left menu, click Locations and select a location.
3. On the top menu, click Ticket Types > PARCS Transient ticket type.
4. Scroll to the bottom of the page to Linked Flash PARCS Prices.
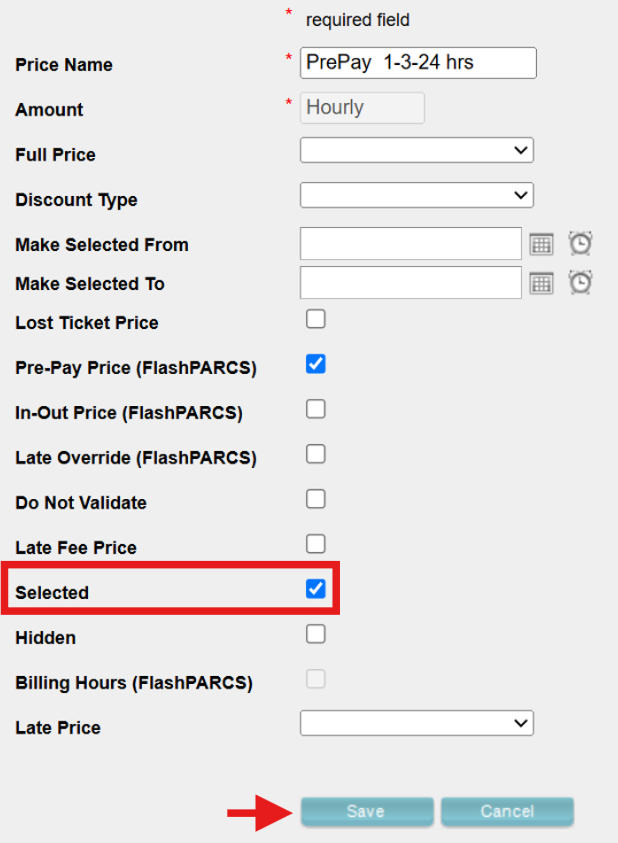
5. Select the PrePay price to enable.
6. (Optional): You can schedule PrePay rates to automatically start and end so you don’t have to switch the rates manually.
For example, you may want to set a rate in advance that’s valid only during an event. To do this, in the Valid From and Valid To fields, set the date and time you want the rate to be valid. The rate will automatically switch during the set valid times.
Check the How to Schedule a PrePay Rate for a one-time event demo section below.
7. Check Selected and click Save. Checking Selected will enable the PrePay Price right now, for a future date and time, use the Valid From and Valid To fields.
How to Schedule a PrePay Rate for a one-time event demo
Set Up
- Log in to the Admin Portal.
- Select the Location.
- Navigate to the Ticket Type tab, or the Logical Zone tab (for locations with Logical Zones).
- Scroll down to the Linked Flash PARCS Prices section.
- Click the price you want to schedule and ensure it is not selected (✔). If it is selected, the Make Selected From/To fields will be grayed out. Or add a new price.
- Set the desired date and time for the price schedule.
- Click Save to apply the changes.
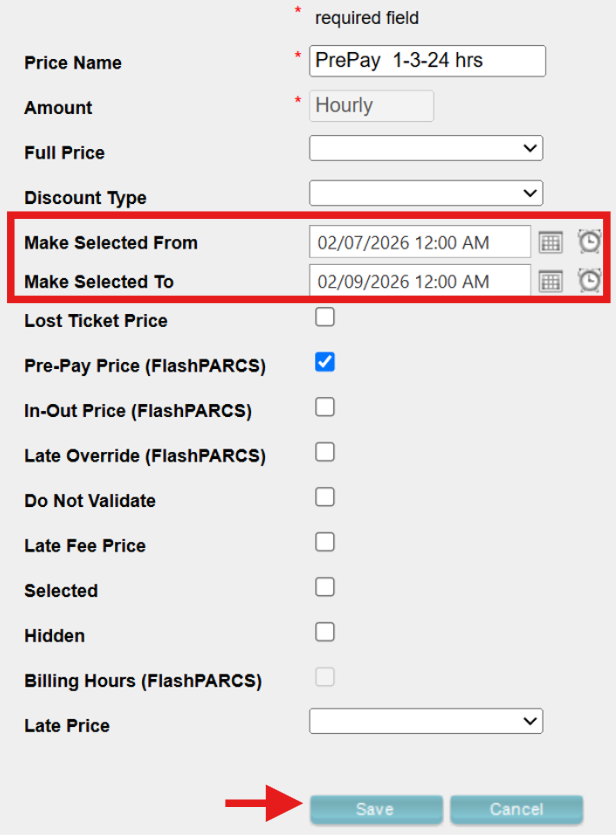
The Selected flag must remain unmarked for the set schedule to take effect in the configured time frame. If the Selected flag is marked, the configured price will take effect immediately.
Enable the “Make Automatic” Setting
For this feature to work, Make Automatic must be enabled either at the Ticket Type level or at the Logical Zone level (for locations with Logical Zones only).
Keep in mind:
- Make Automatic is disabled whenever a rate is manually selected as the default. To reactivate the Make Selected From/To fields, you must re-enable Make Automatic after manually selecting a rate.
- If Make Automatic is enabled during the valid time, the rate change will not take effect. Make Automatic must be enabled before the valid time begins.
- Once enabled, the Make Automatic setting will appear greyed out.

How to Disable PrePay Mode
Via Flash Valet App
The PrePay Mode can be manually disabled by tapping the Select button next to the Disable PrePay price option. The location or logical zone will automatically revert to the previously enabled post-pay Transient rate.

Via Flash Admin Portal
1. Go to https://portal.flashvalet.com and log in to the Admin Portal.
2. On the left menu, click Locations and select a location.
3. On the top menu, click Ticket Types > PARCS Transient ticket type.
4. Scroll to the bottom of the page to Linked Flash PARCS Prices.
5. Select the "Disable PrePay" price and check Selected.
6. Select Save and the system will switch back to the previously Selected price before Prepay was enabled.
PrePay Mode is not compatible with Automatic Capacity/Auto Open Full.Was this article helpful?
That’s Great!
Thank you for your feedback
Sorry! We couldn't be helpful
Thank you for your feedback
Feedback sent
We appreciate your effort and will try to fix the article