DIGITAL VALIDATION GUIDE FOR MERCHANTS
Here's a How to Guide for Merchants on how to manage their accounts, users, and digital validations.
Overview
Customers and employees need a place to park. Parking validation programs are an excellent way for your business to connect with nearby parking garages to reward your loyal customers or employees with free or discounted parking.
With Ticketech's Digital Validations portal, Merchants can digitally distribute offerings to internal employees or visiting patrons.
Getting Started
Once your registration has been approved, You will receive the following 2 emails to setup your account:
- A welcome email
- An email to set up your password

Setup your account & create your password
To setup your password:
- Open the email with the subject "Verify your email address".
- Select Create Password


Sign In
To access the parking portal, go to https://validate.ticketech.com.
- Bookmark this page for easy access.
- If you are using a shared device, be sure to log out of your session when you are done.

Once logged in, Merchants can:
- Manage their account profile
- Share validations with guests, patrons or employees
- Request and purchase additional validations
- Create users
Get started by sharing a validation or providing access to a user who can issue parking validations to your guests on your behalf.

Merchants can provide access to the validations portal for employees that will be responsible for issuing validations to your guests.
To create a user, follow these steps:
- Navigate to the Manage Users tab from the left-hand navigation
- Select Add New User
- Complete the form:
- Name
- Username
- Email Address
- Select a Role
- Merchant users will have administrator access, add users, issue validations, and view usage.
- Validator users will have the ability to share validations with guests.
- Once created, Users will receive two emails to set up their user account.
- One email will be a welcome email
- One email will be to create their password.
How to Validate Parking
There are several ways to share a parking validation, choose an option below and follow these steps when a guest arrives at your location, and requests their parking to be validated:
Option #1 (Preferred)
Link a parking validation to a ticket number:
1. Navigate to Share Validation in the side navigation menu.
2. Choose a validation program you want to share with your guest.

3. Choose the Link Validation to a Ticket option to share the validation with your guest

4. Prompt the guest to provide their ticket number located on their claim check (printed or digital).
5. May I have the ticket number located on your parking claim check, please?


6. Enter the Ticket Number and click Send.

7. Congratulations! The ticket is now successfully validated.
8. Inform the guest that their ticket is now successfully validated and can present their claim check to the Parking Attendant when they are ready to check out.
Option #2
Share parking validation via text or email
When a guest arrives at your location, and requests their parking to be validated:
1. Navigate to Share Validation in the side navigation menu
2. Choose a validation program you want to share with your guest
3. Choose the Send Validation via Text —OR— Send Validation via Email option to share the validation with your guest

4. Depending on the method selected in the previous step, prompt the guest to provide either their Email or Phone Number.
5. Enter the Email or Phone Number click Send.

6. Congratulations! The Parker should receive a text or email with a hyperlink to a Validation QR code.
7. Inform the guest that they must present BOTH their validation QR code AND their claim check to the Parking Attendant when they are ready to check-out.

Manage Payments
Add Payment Method
Payment methods can be used to purchase validations from your Parking Operator.
- Navigate to the Payment Method tab from the left hand navigation
- Select Add Payment
- Enter payment and billing information
- Save

Manage Orders
Request Additional Validations
Want to request to request additional validations for available for purchase?
Follow these steps below:
1. Go to Manage Validations in the left hand navigation
2. Select New Request for a validation program you wish to request

3. Enter a quantity of validations to request.
4. Select a Payment Method that will be charged if the order request is approved.
Payment that is selected in Step 4 will be charged immediately after it is approved by the Parking Operator.
5. Select Continue.
6. Check off and acknowledge the Authorization Disclaimer.
7. Select Confirm Order.
- If an order request is declined by the Parking Operator, you will receive an email notification. Order status can also be tracked in the validation program's sale history.
- If the Parking Operator modifies an order request, the request will be sent back to the Merchant for re-approval. Payment methods will not be charged.
View and Complete Orders
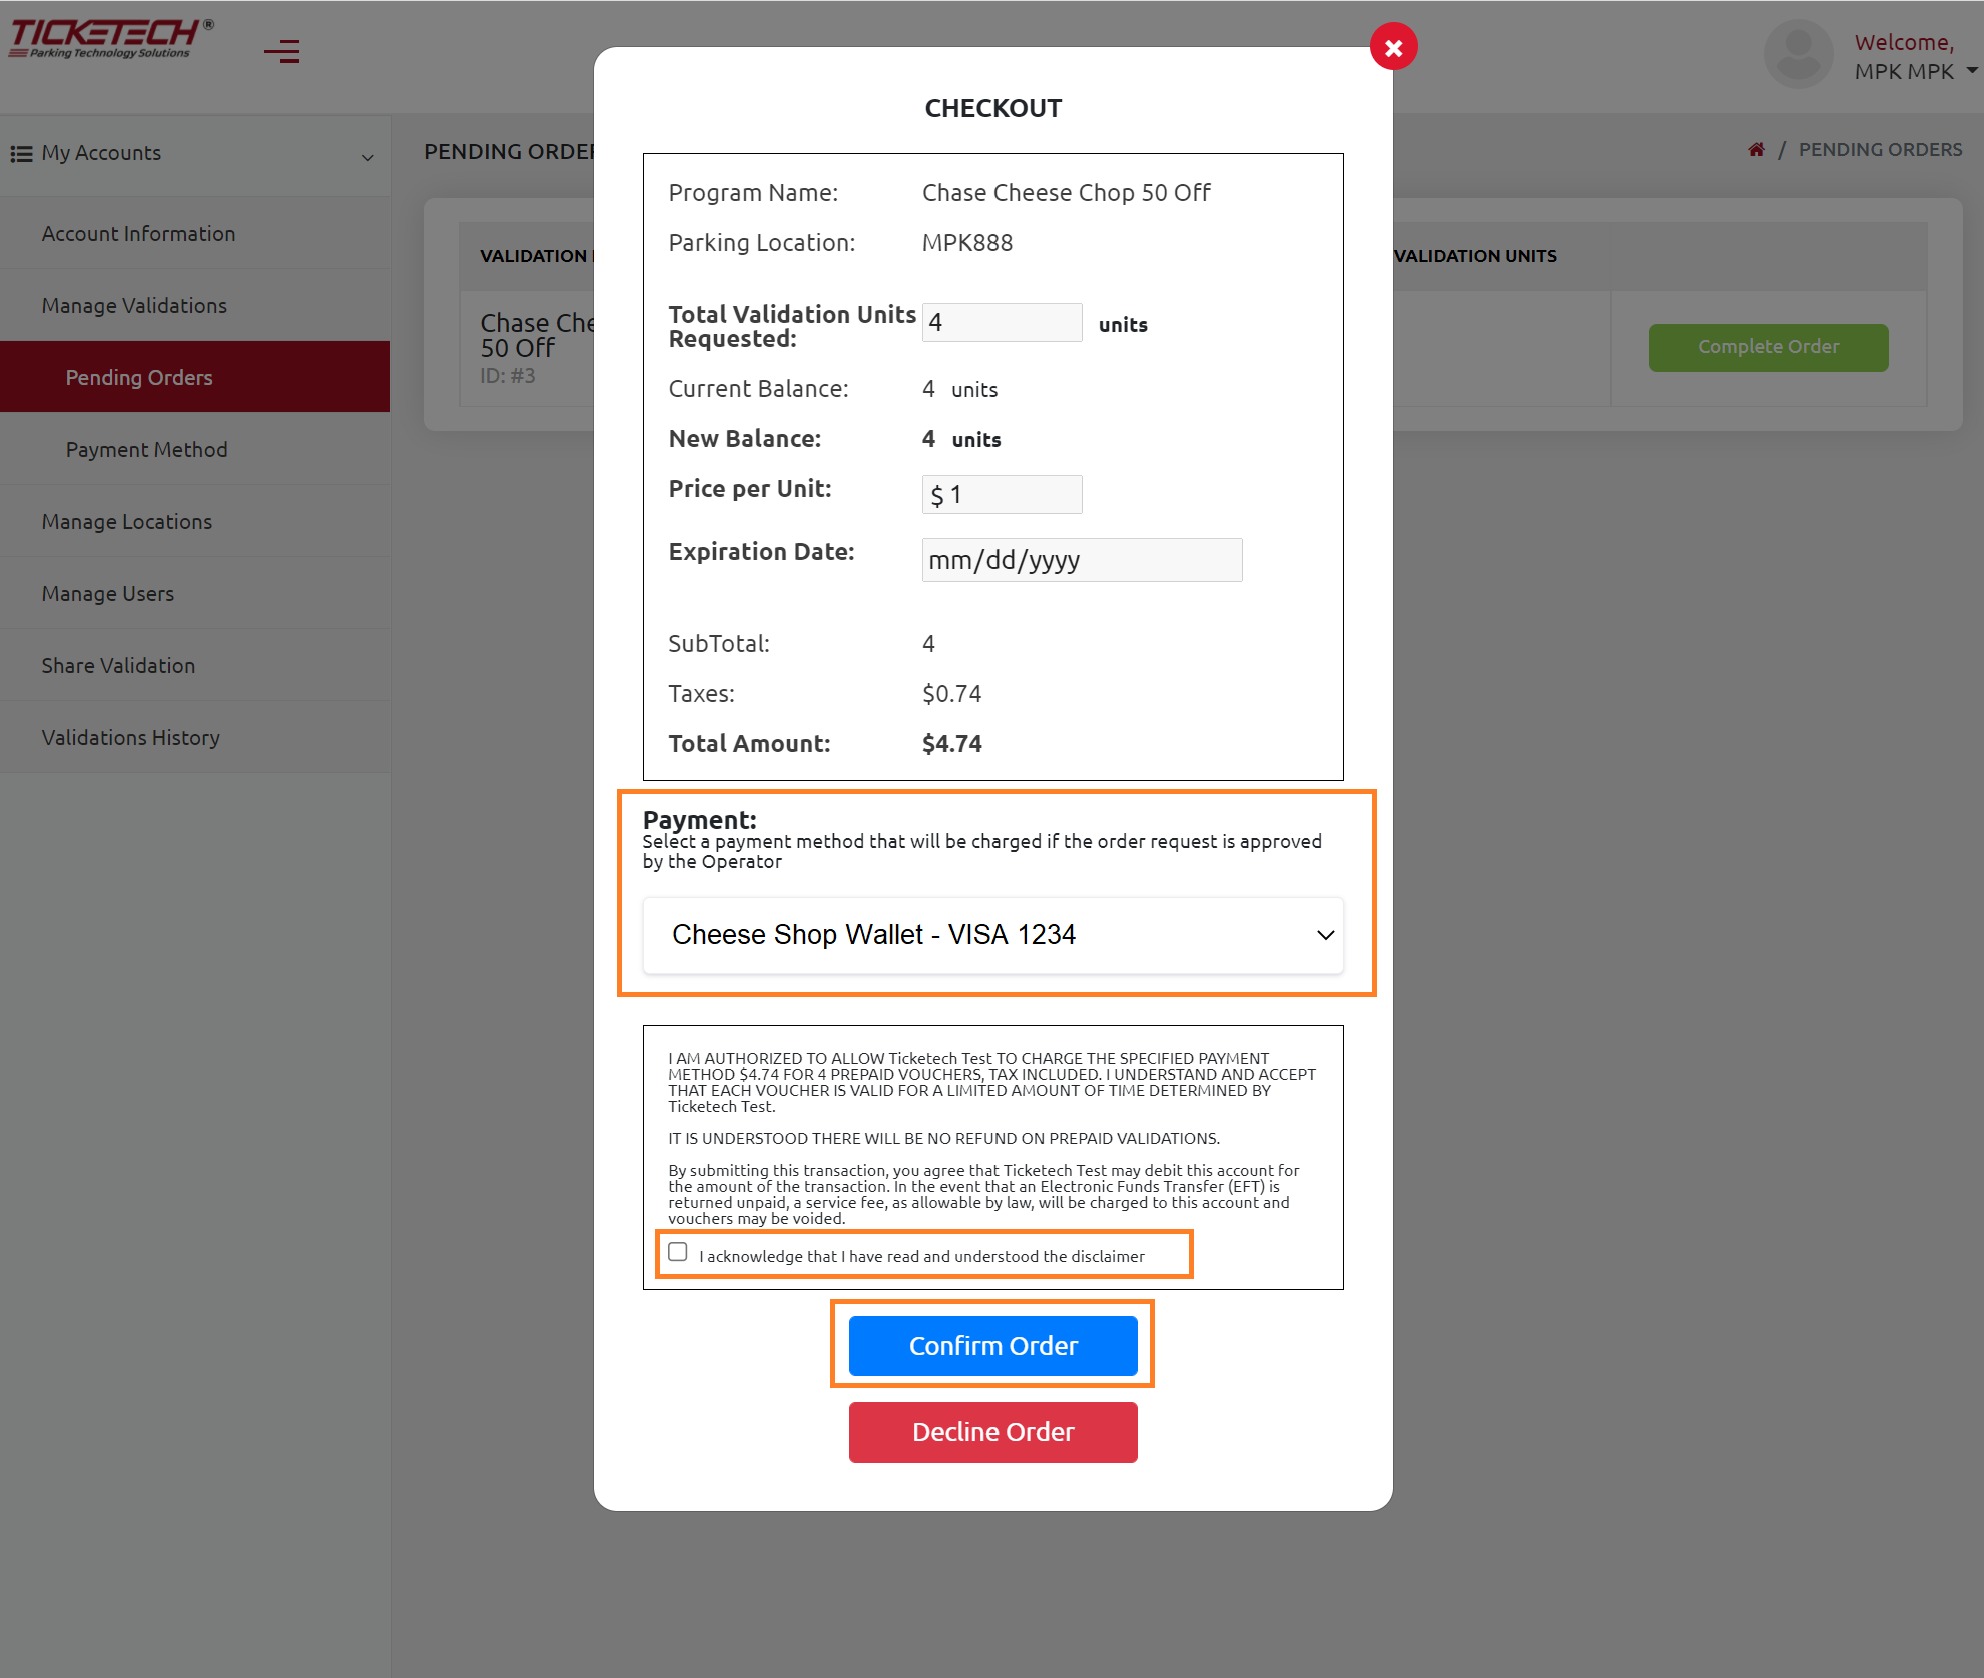
To complete pending validation purchase orders:
1. Go to Pending Orders in the left-hand navigation.
2. Select Complete Order

3. Select a Payment Method that will be charged.
4. Acknowledge the authorization disclaimer
5. Select Confirm Order

- Validations are now available to use.
- Receipts are available in in Validation Program's Sale History
View Order History and Receipts
To view your order history and receipts
- Go to Manage Validations
- Select Ellipses
- Select View Sales History

- Select the Ellipses for an Order
- Select View Order Details
- Select View Receipt


Was this article helpful?
That’s Great!
Thank you for your feedback
Sorry! We couldn't be helpful
Thank you for your feedback
Feedback sent
We appreciate your effort and will try to fix the article